NAS with ESOS and Windows Server
Use iSCSI to mount a NFS over Ethernet
General
We will create a Network File System for our Windows Server 2019 by using the opensource Storage Platform ESOS.
Physical Environment
Requirements
- USB Stick >4 GB
- Switch (Ethernet)
- Server/Storage with multiple Disks
- ESOS zip file: Download here
- Windows Server 2019
Installation
First we have to create a bootable USB Stick with ESOS. I made a video about the ESOS installation: How to install ESOS Storage.
Unzip the .zip file. Plug in your USB Stick and check with lsscsi where your USB Stick is located. Start the installation and type in the location of the USB Stick e.g. /dev/sda when prompt.
unzip esos-master_7842102_dgvszq.zip
lsscsi
sudo umount /dev/sda1 #remove the logical disk from your system
cd esos-master_7842102_dgvszq/
sudo ./install.sh
/dev/sda
Put the USB Stick in your Storage/Server and change the boot order in the UEFI or BIOS settings so it gets booted from the USB Stick. Now the Server will boot to the USB Stick and the ESOS GUI will appear. The USB Stick is your Storage Controller so every configuration will be saved on the USB Stick.
I will only configure the virtual enviromnent but it's pretty much the same except that you add the physical Disks to an Array and not the virtual Disks.
Virtual Environment
Requirements
- VMWare ESXi
- vSwitch
- ESOS ISO file: Download here
- Windows Server 2019 ISO file
The advantage of a NAS with iSCSI is that you don't need any special HBA's or CNA's or Fibre Switches. The whole communication between the Host and the Storage is done through iSCSI a protocol to transport SCSI Commands over ethernet. So the only thing you need is an ethernet connection between the target (ESOS) and the initiator (WIN2019).
I created a vSwitch (called VM Network) in ESXi and both VMs are connected to it.
I also recommend to use the VMWare Remote Console (VMRC) Download here when you access the Windows Server 2019 VM.
Installation
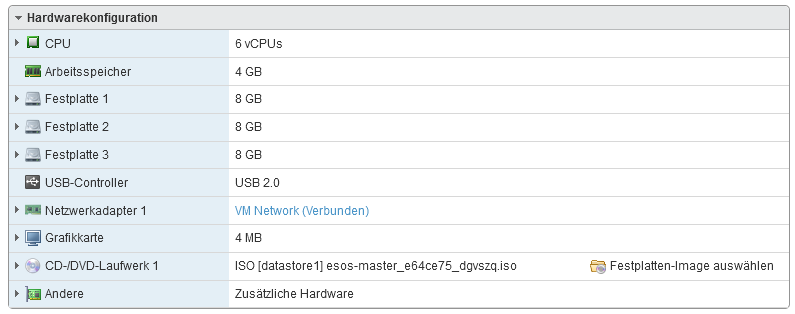
First we create the ESOS VM with two additional Disks to create a RAID.
Then we create the Windows Server 2019 VM. Both VMS are in the same local network.
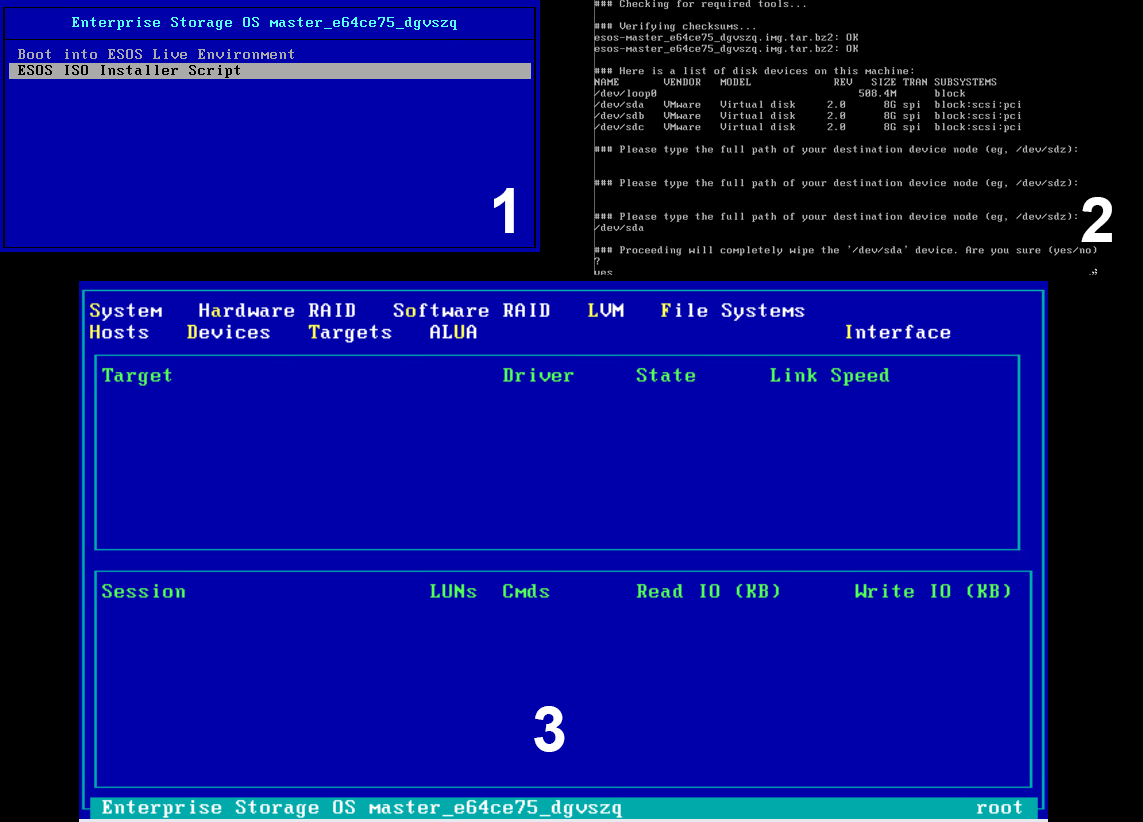
Start the ESOS VM and install it. Credentials are: root/esos
THE GUI will appear after login. Navigation is with Keyboard Shortcuts (yellow letters).
Configuration
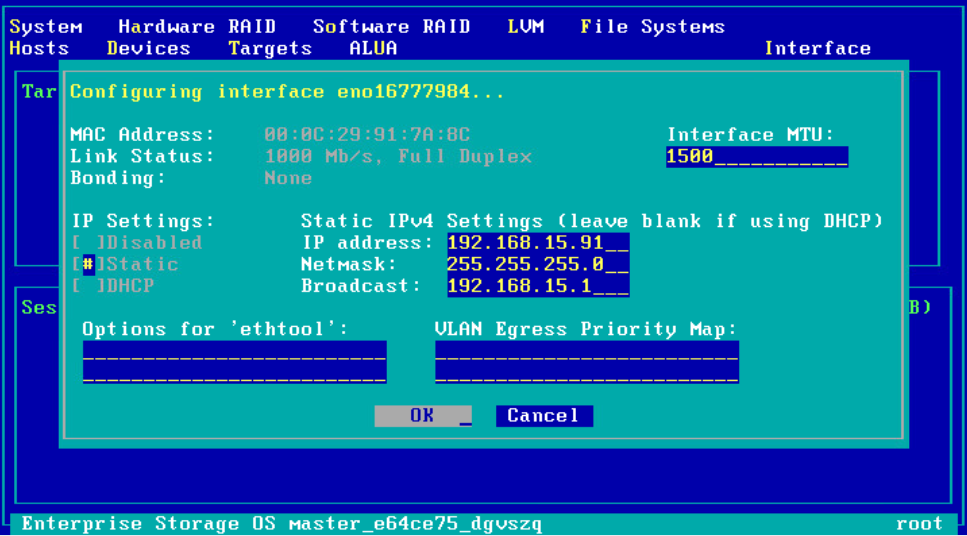
First configure the Network Settings. Press S -> Network Settings. Now you can also use SSH to access ESOS.
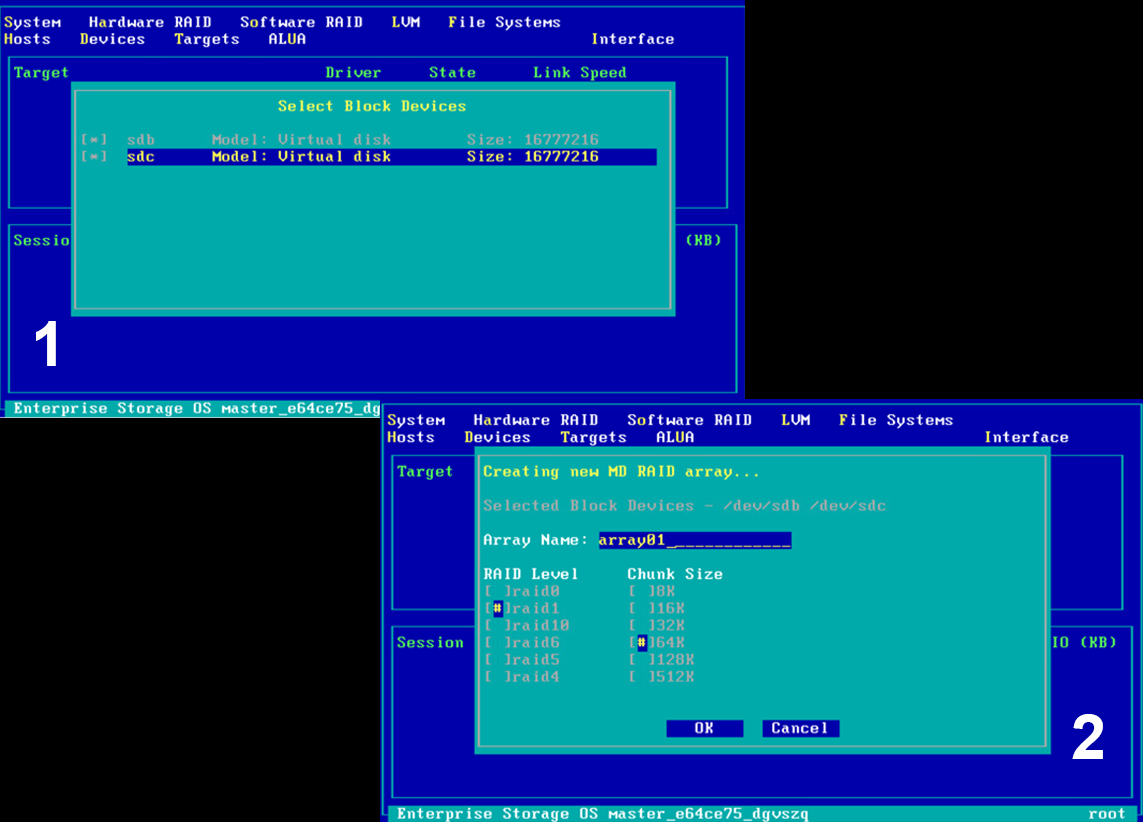
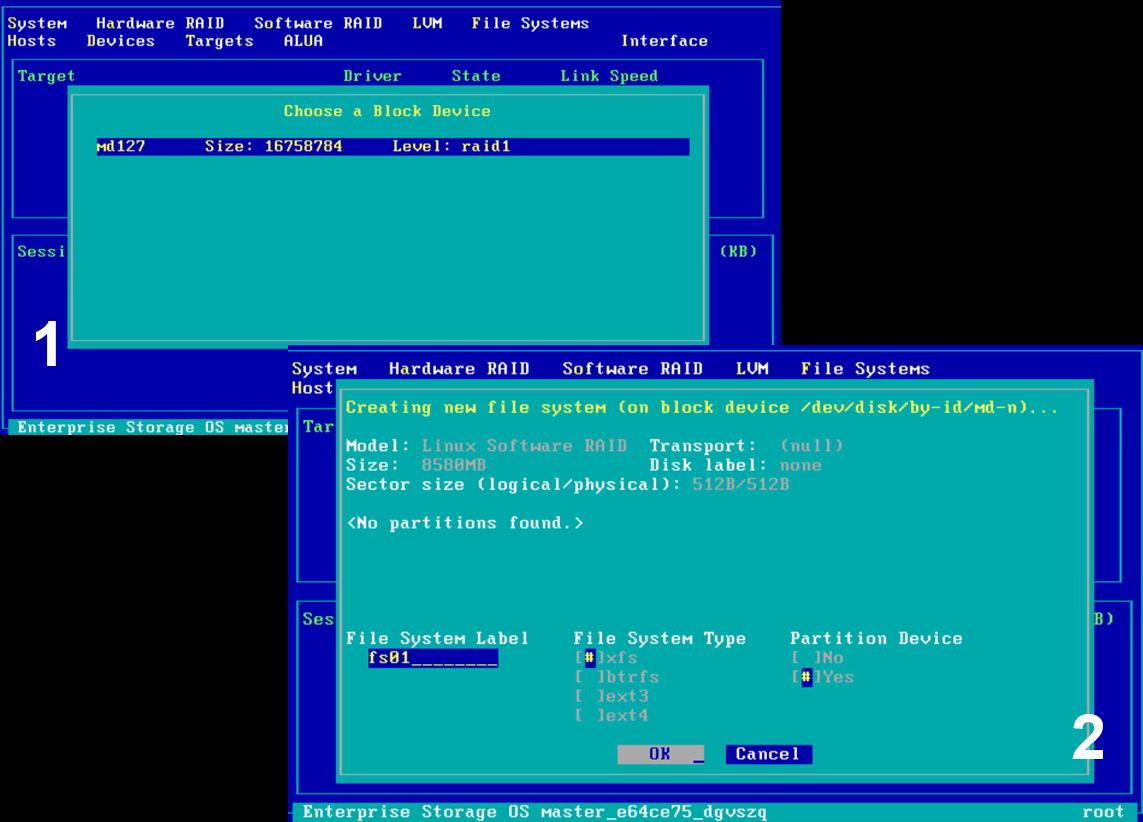
Create the RAID. Press O -> Add Array.
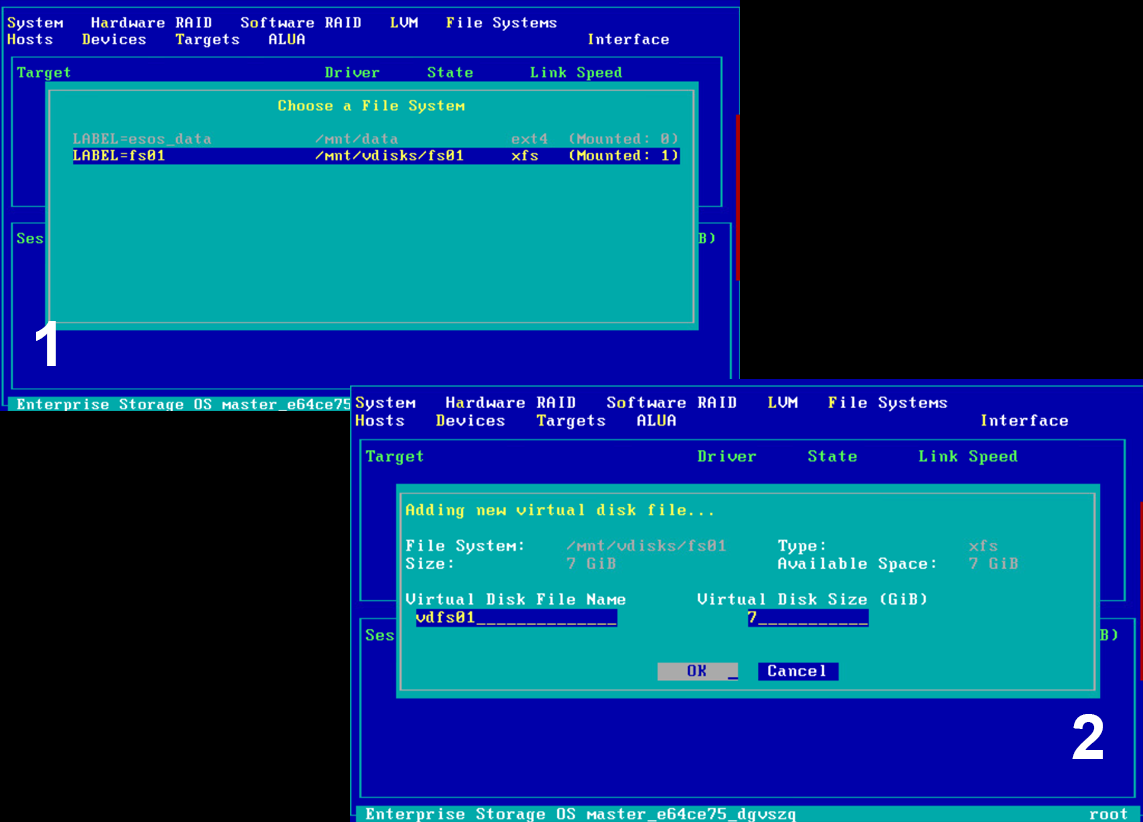
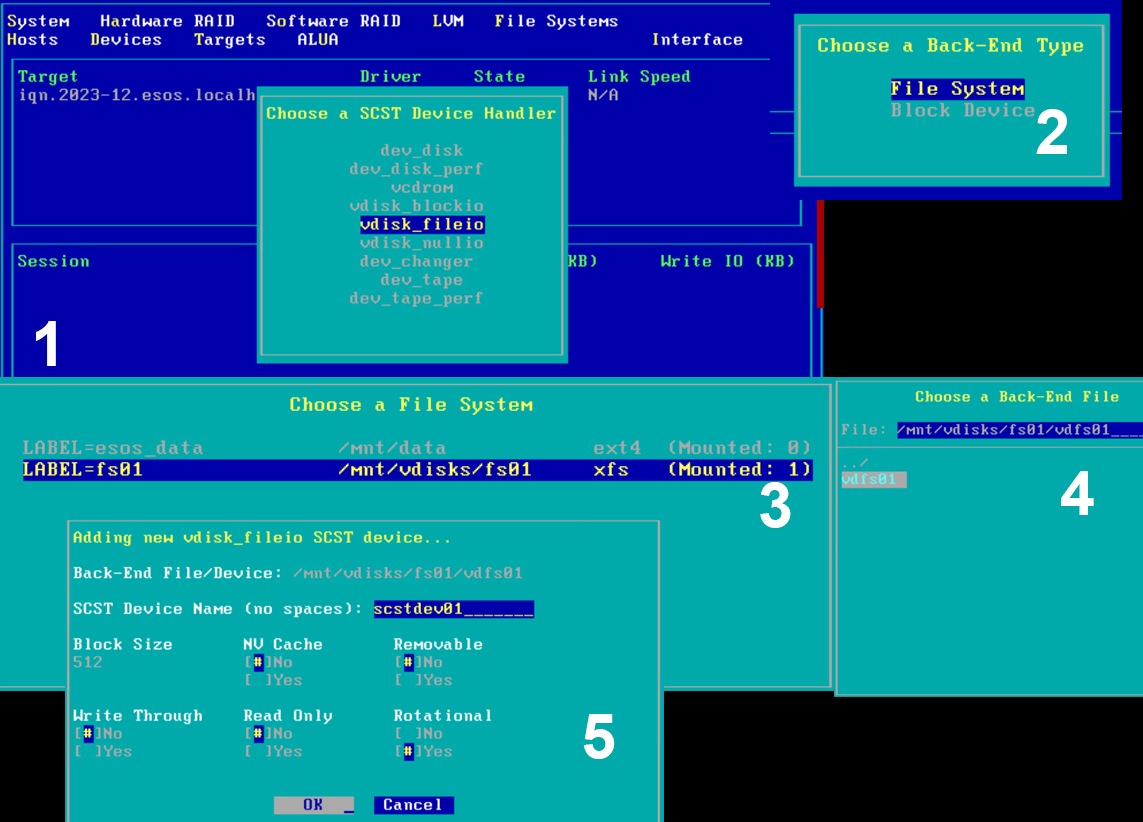
Create the File System and mount it. Press F -> Add File System.
Create the virtual Disk. Press F -> Add VDisk File
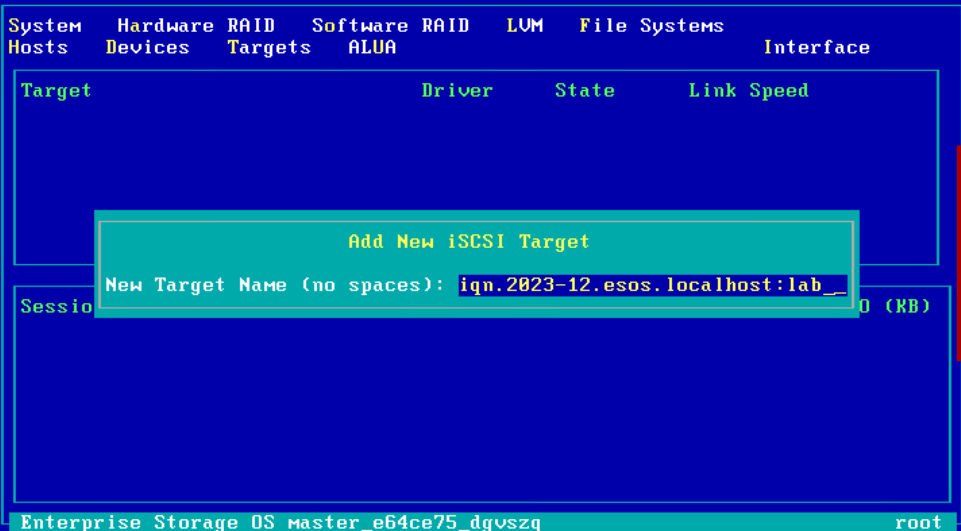
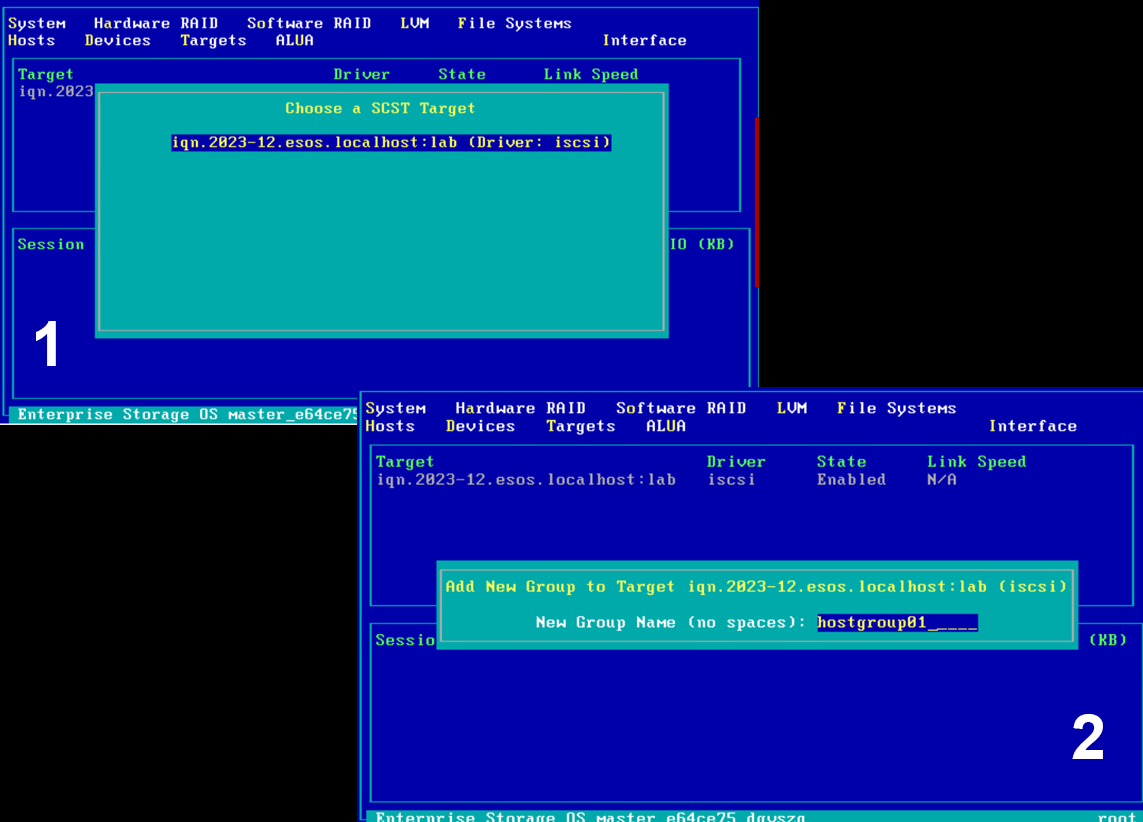
Add the iSCSI Target. Press T -> Add iSCSI Target
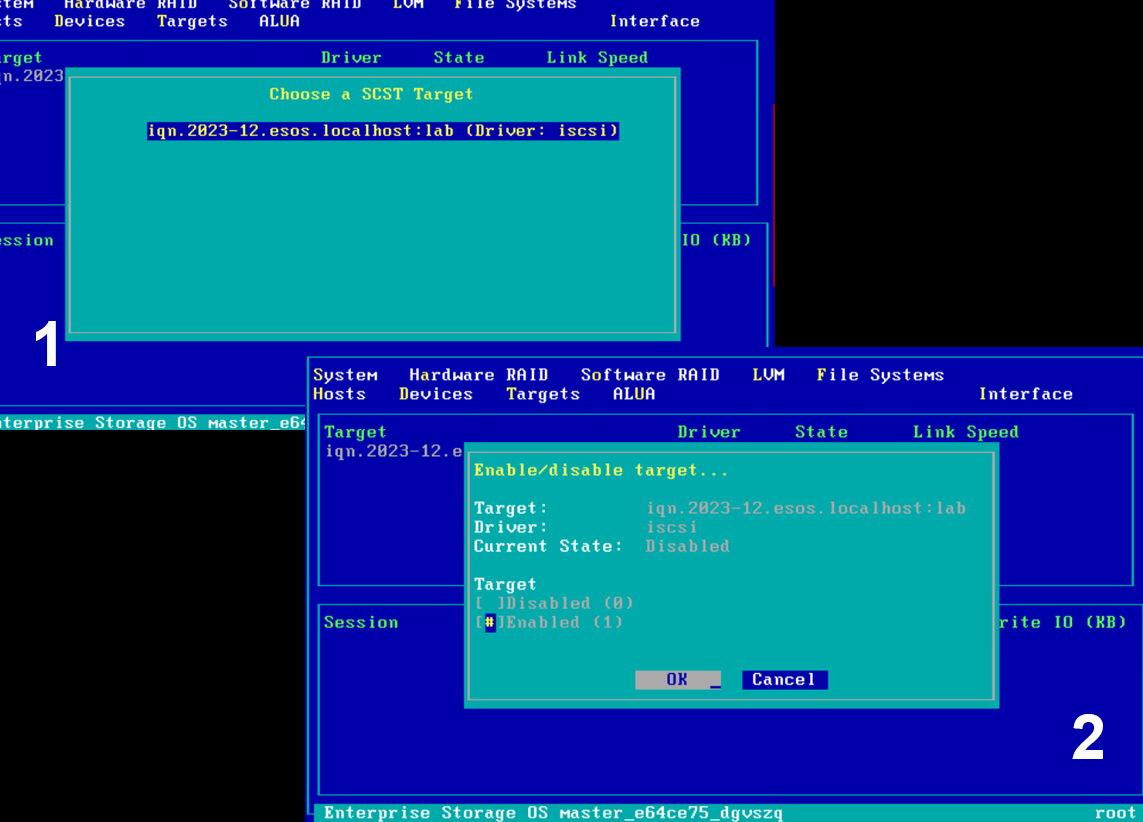
Enable the iSCSI Target. Press T -> Enable/Disable Target
Create a Group. Press H -> Add Group
Add the SCST Device to the Filesytem. Press D -> Add Device
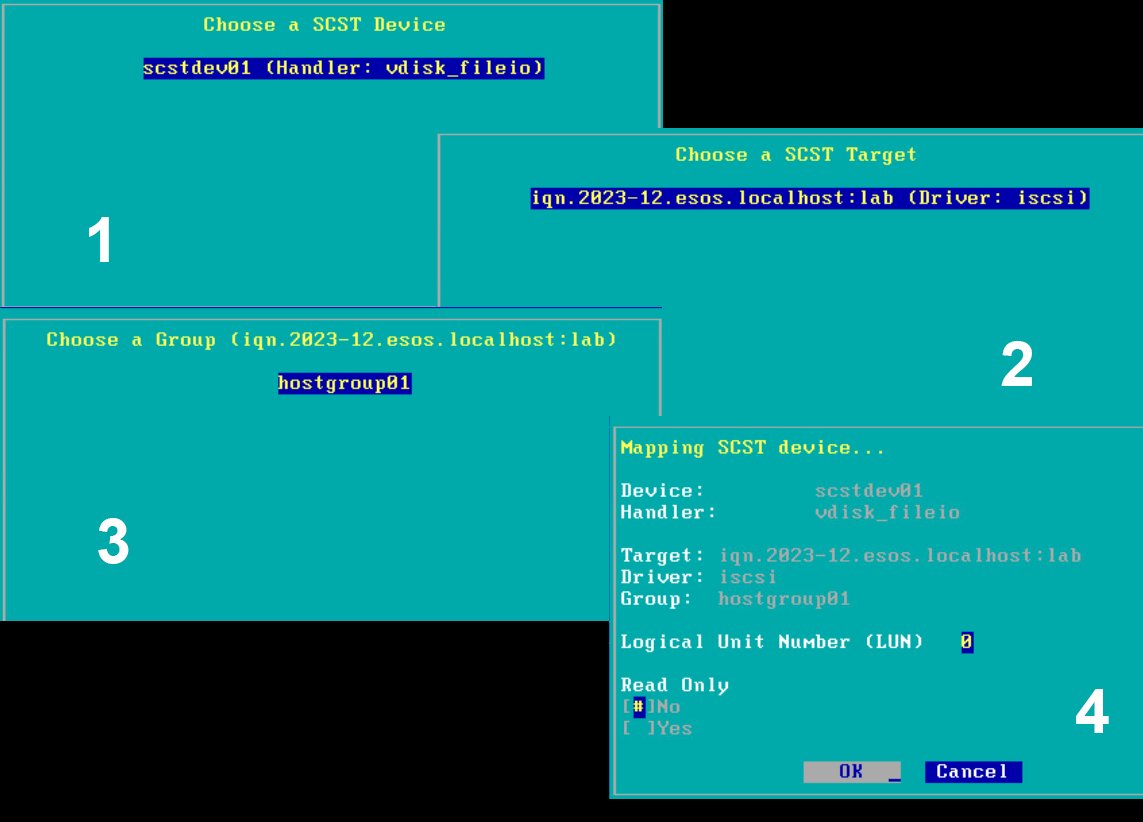
Add the SCST Device to the Host Group. Press D -> Map to Host Group
Now the next step is to add the iSCSI Initiator (Windows Server 2019). So we will first configure the Windows Server.
I installed the Windows Server with the Desktop Environment from the ISO file.
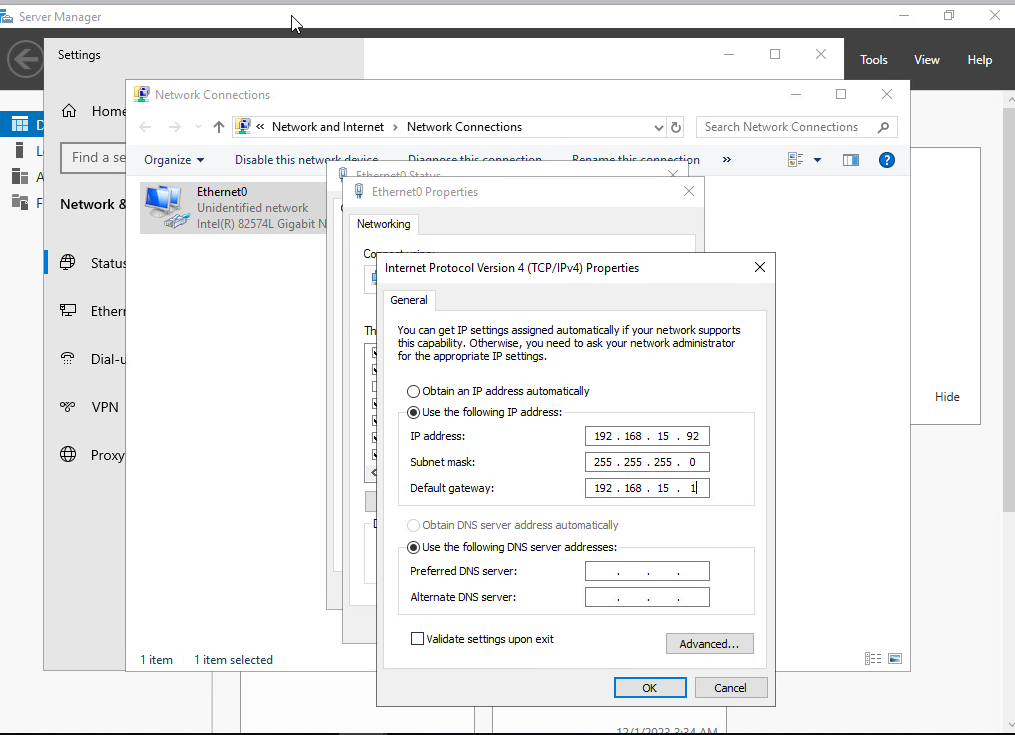
First we will configure the network settings and ping the ESOS VM (192.168.15.91). It has to be reachable.
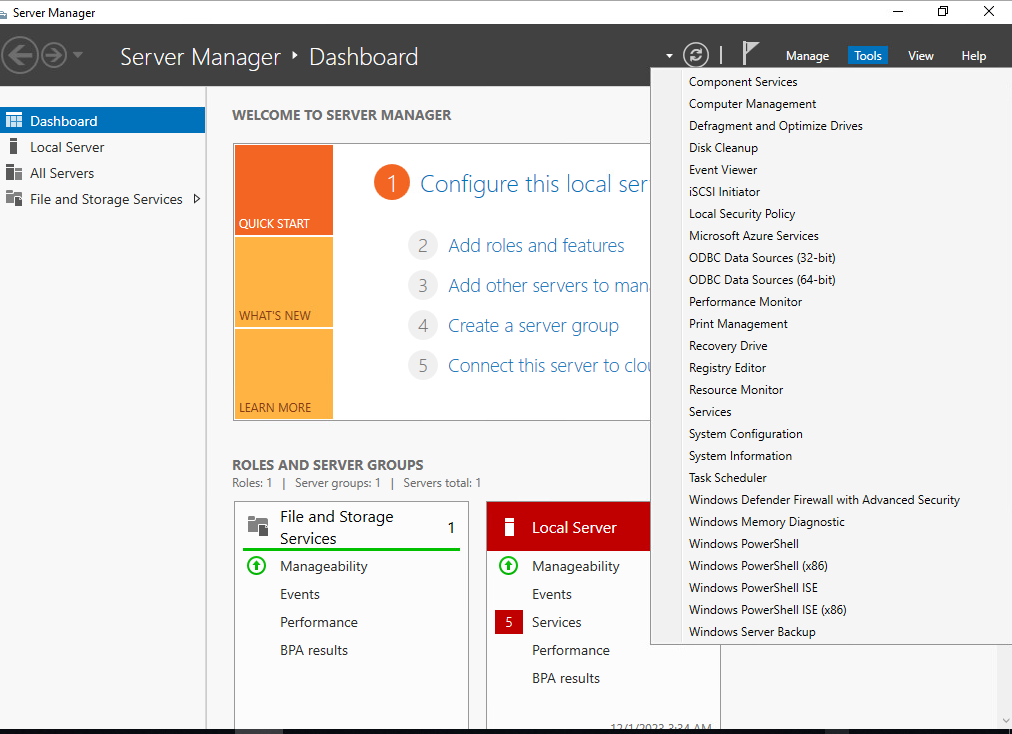
Active the iSCSI Initiator. Go under Tools -> iSCSI Initiator and click yes when prompt.
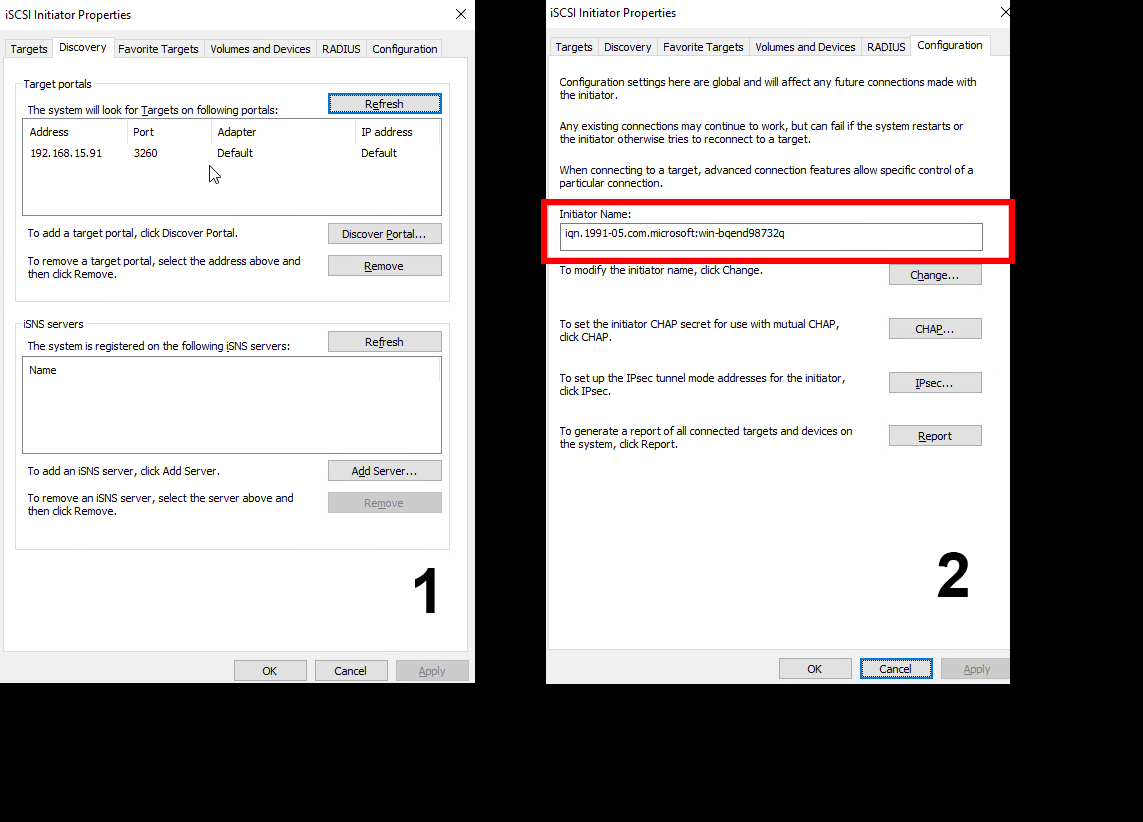
In the iSCSI initiator Properties make sure the system found the right portal (ESOS VM) to look for targets and check the iSCSI initiator Name.
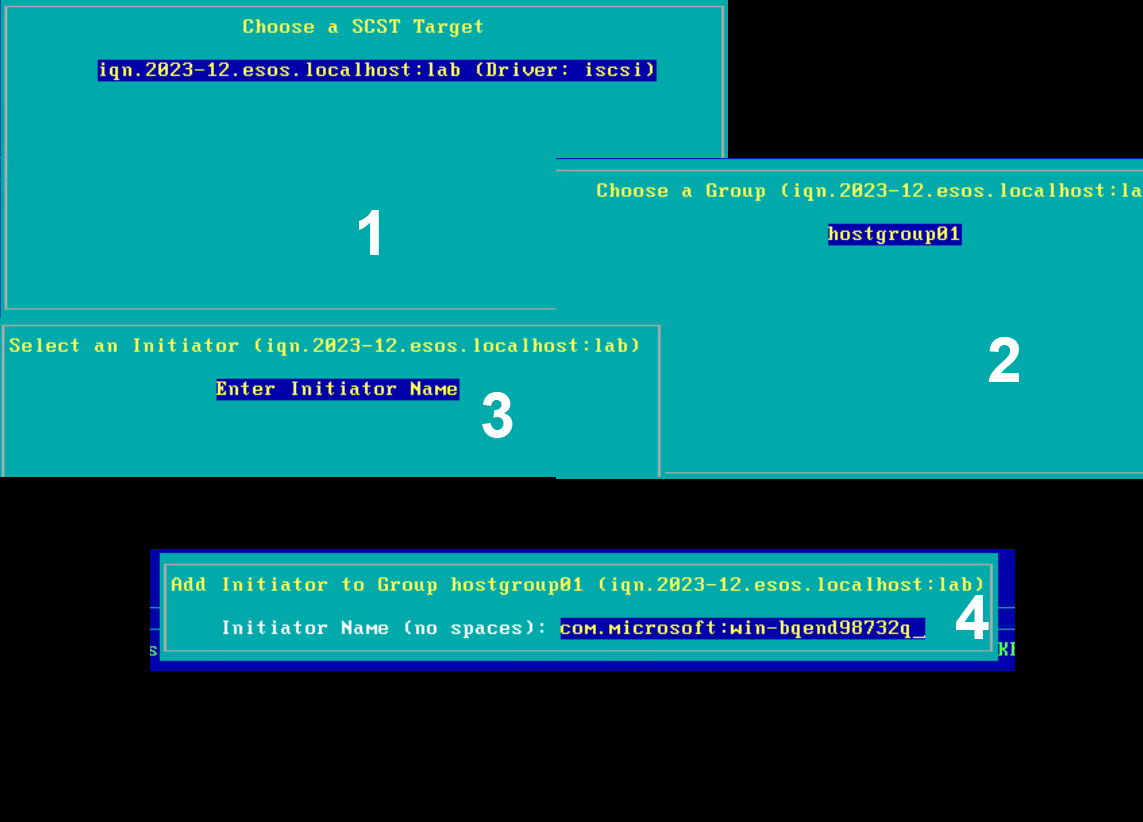
Copy/Paste the iSCSI initiator Name to the ESOS VM. Click H -> Add initiator.
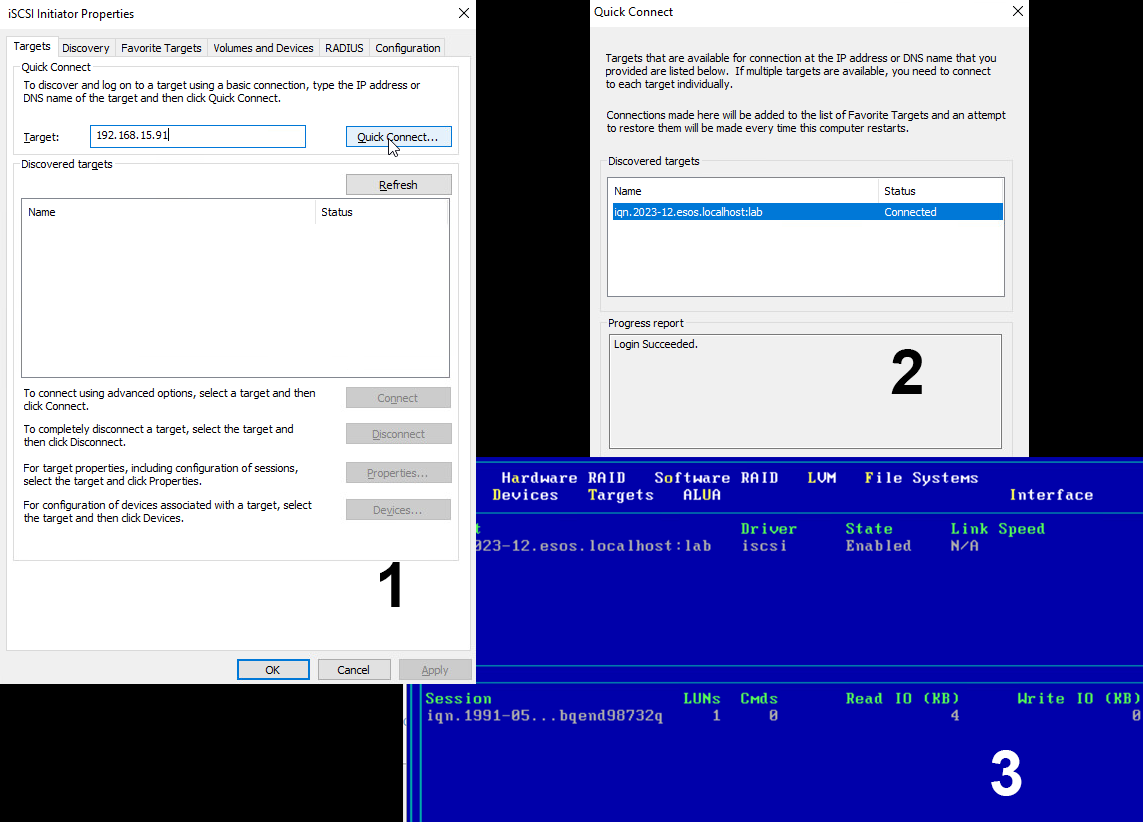
Back in the Windows Server VM type in the IP of the ESOS VM and click on Quick connect. In ESOS VM the Iniciator should now appear under Sessions.
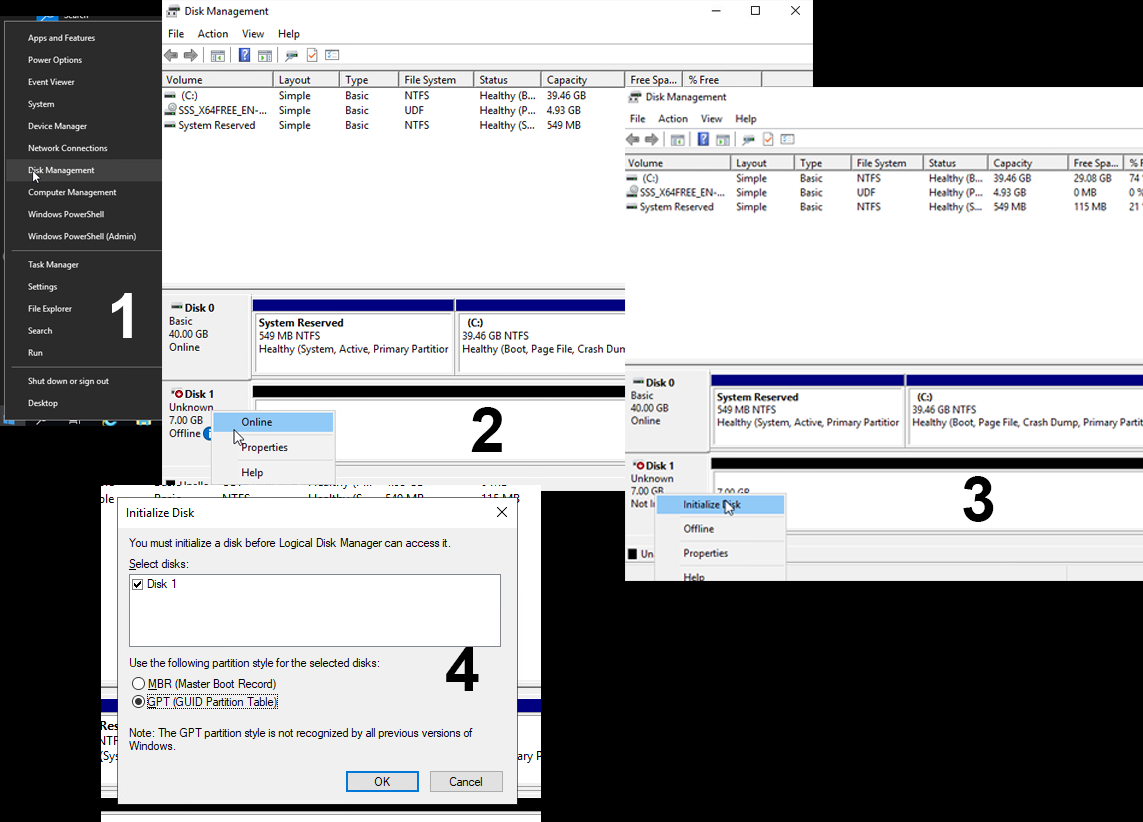
Under Disk Management put the new Disk online and initialize it.
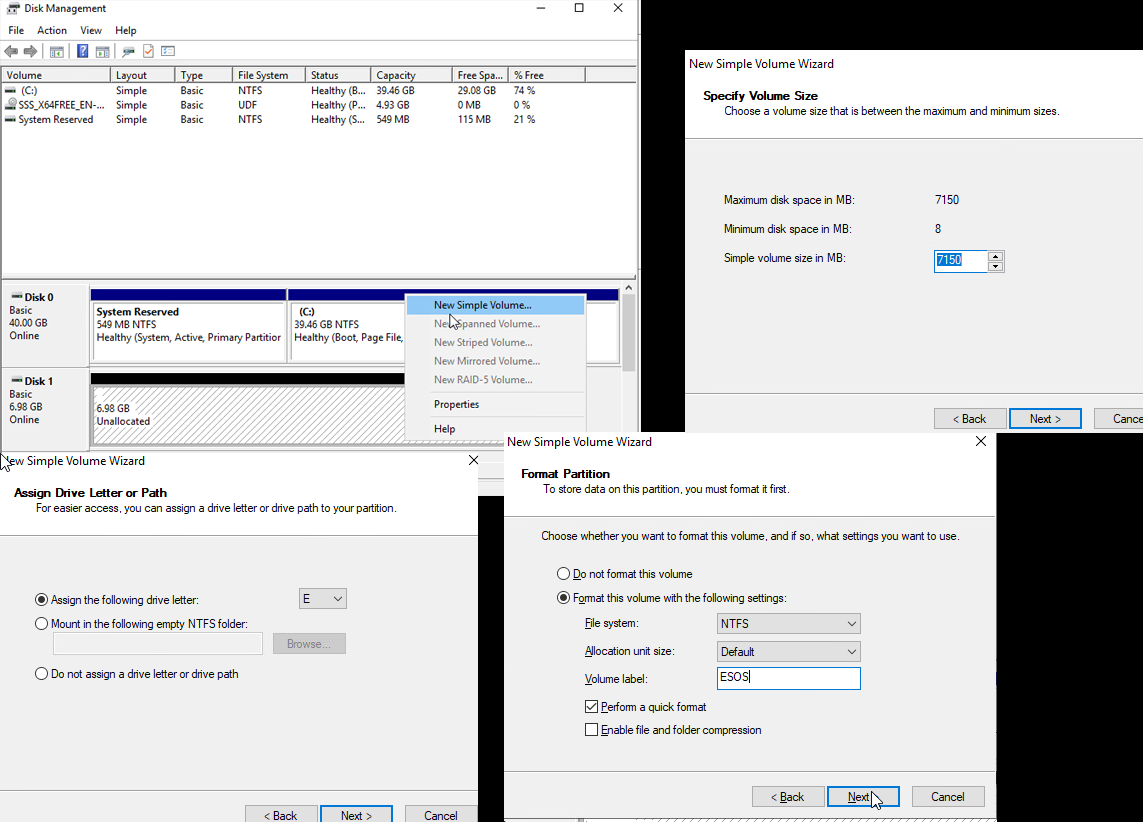
Create a Volume.
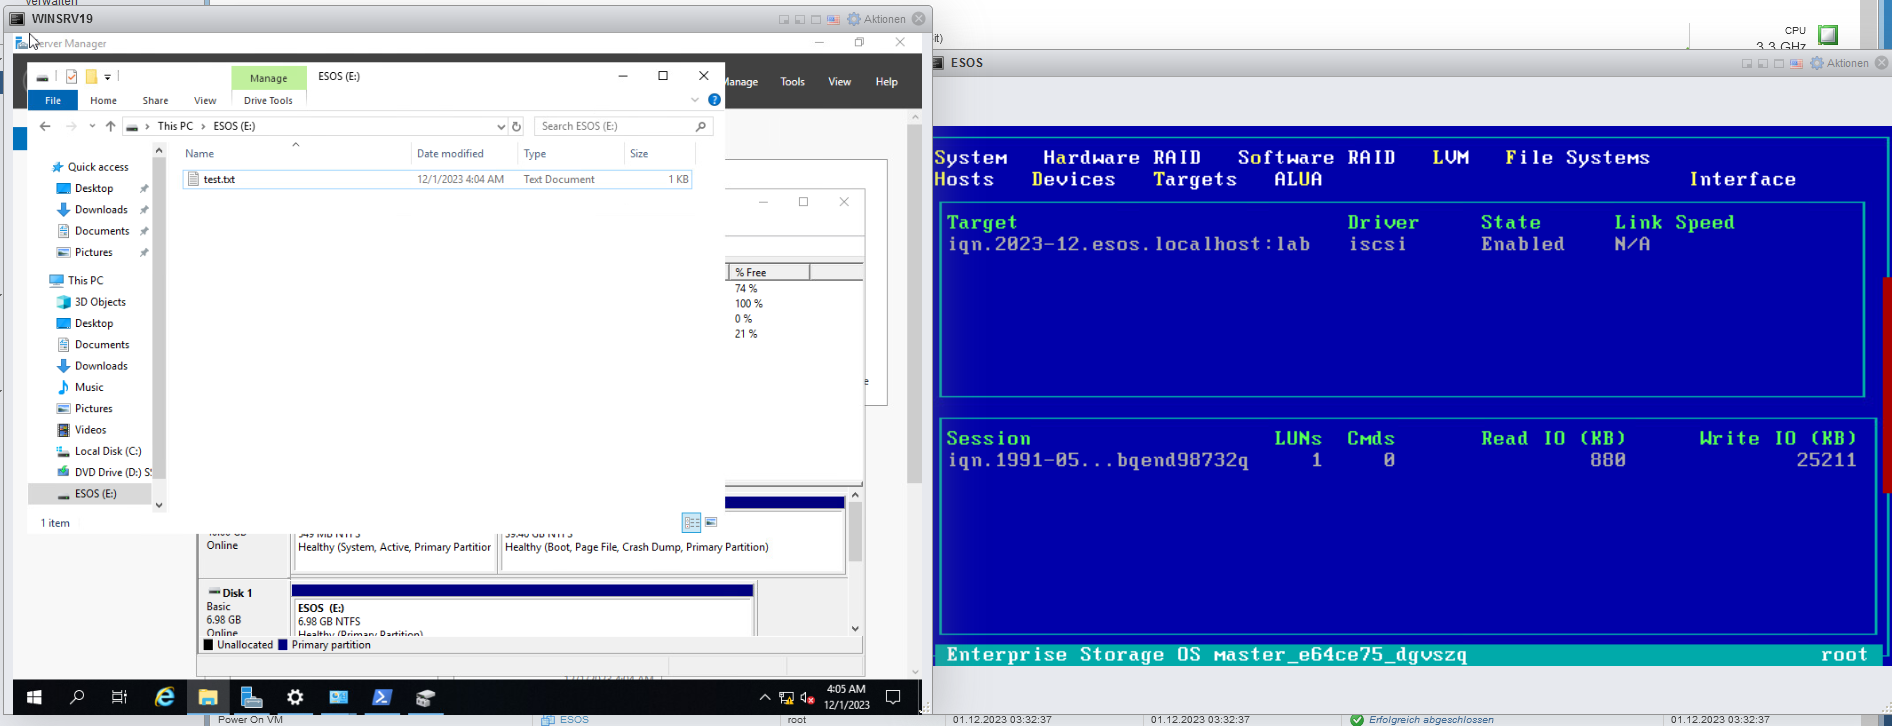
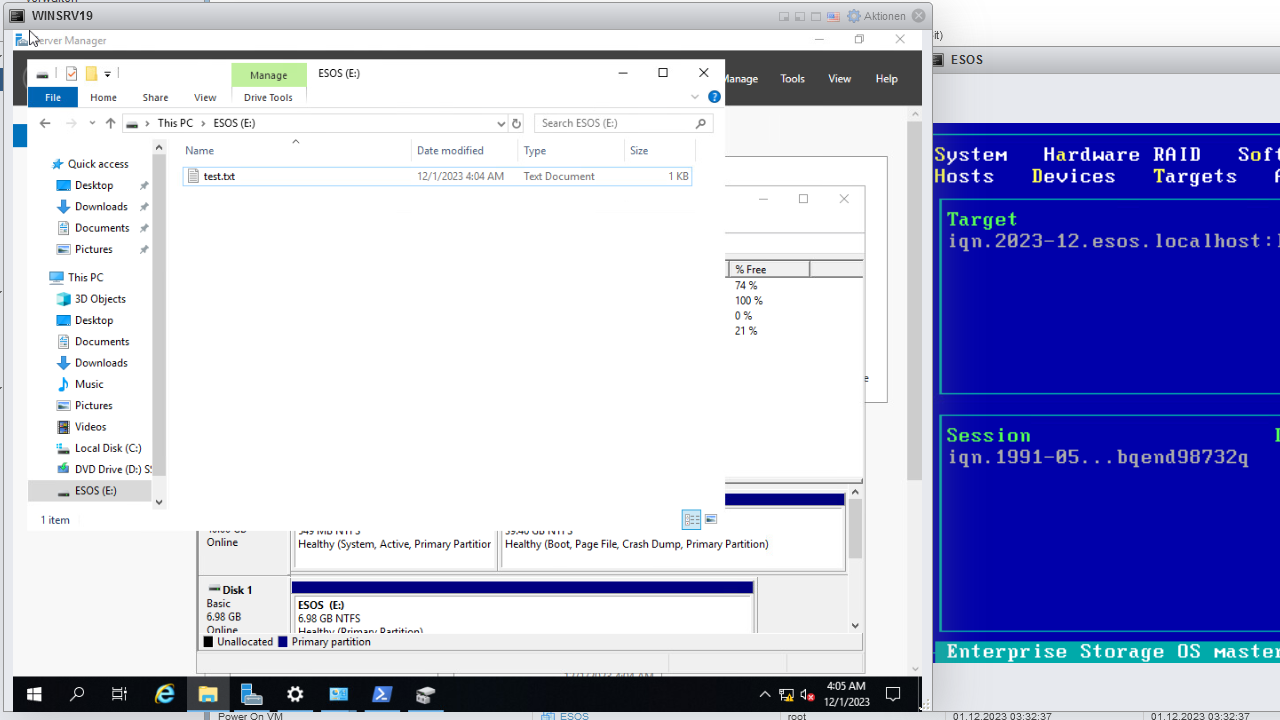
And thats it. Now if we open the Windows Explorer we have our new mounted ESOS volume and can use it as new directory for our files.
Thanks for reading my article. If you have any questions or recommendations you can message me via arvednetblog@gmail.com.
